Introduction:
Vertical gardening has gained popularity in recent years as an efficient way to maximize space and grow a variety of plants, even in small areas. One creative and inexpensive solution for vertical gardening is building your own PVC pipe vertical planter. In this article, we’ll guide you through six easy steps to create your DIY PVC pipe vertical planter, perfect for growing herbs, flowers, or even strawberries. Let’s get started!
Step 1:
Gather Your Materials Before you begin, gather the following materials:
- PVC pipes (4-inch diameter)
- PVC pipe caps (4-inch diameter)
- PVC pipe glue
- Saw or PVC pipe cutter
- Drill with a hole saw attachment
- Potting soil
- Plants or seeds of your choice
Step 2:
Measure and Cut the PVC Pipes Using a saw or PVC pipe cutter, measure and cut the PVC pipes into equal lengths. The length of the pipes will determine the height of your vertical planter, so choose a size that fits your space and gardening needs. Each PVC pipe segment will serve as a planting section for your vertical garden.
Step 3:
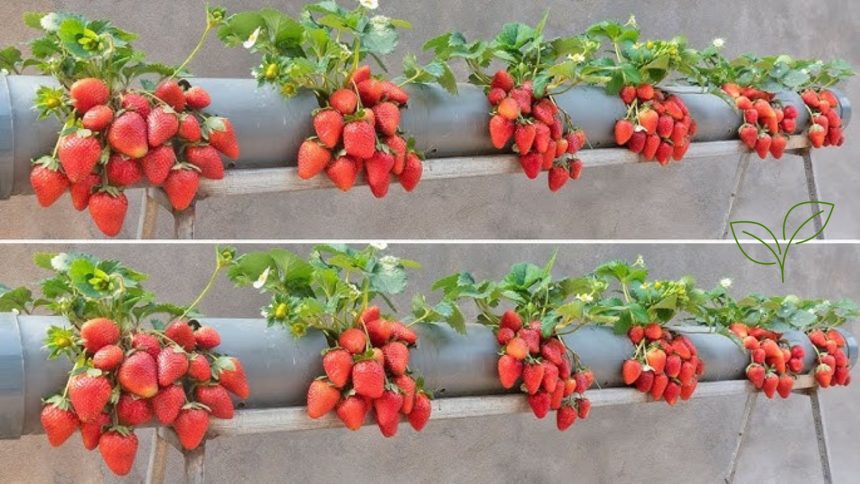
Drill Holes for Planting Next, use a drill with a hole saw attachment to create planting holes in the PVC pipes. Space the holes evenly along the length of each pipe, leaving enough room between holes to accommodate the growth of your plants. The size of the holes should be large enough to insert plant pots or directly plant seeds into the soil.
Step 4:
Assemble the PVC Pipes Once you’ve drilled the planting holes, assemble the PVC pipes into a vertical structure. Use PVC pipe glue to secure the pipes together, stacking them vertically to create multiple planting levels. Ensure that the pipes are stable and securely attached to each other to prevent them from tipping over once filled with soil and plants.
Step 5:
Fill the Pipes with Soil With the PVC pipe structure in place, fill each section with potting soil. Add enough soil to cover the bottom of each pipe and fill it up to the level of the planting holes. Gently pack the soil to remove any air pockets and create a stable growing environment for your plants.
Step 6:
Plant Your Garden Finally, it’s time to plant your vertical garden! Insert plants or seeds into the planting holes, ensuring they are firmly rooted in the soil. Choose a variety of herbs, flowers, or vegetables to create a vibrant and colorful display in your PVC pipe vertical planter. Water the plants thoroughly after planting and continue to water regularly to keep the soil moist.
Conclusion:
Creating your own DIY PVC pipe vertical planter is a fun and rewarding project that allows you to enjoy the benefits of vertical gardening in any space. With just a few simple materials and steps, you can build a vertical garden that adds beauty and functionality to your home or outdoor area. Whether you’re a seasoned gardener or new to gardening, this project is sure to inspire your creativity and green thumb!